一直很想要自己做窗簾, 因為看起來蠻簡單的, 比做衣服還簡單, 但是事實上因為窗簾布太大塊, 所以也不好做呢! 首先, 我想要把我們家的書房及客廳隔個窗簾, 老公建議用sheer fabrics 就是有一點透的窗簾, 於是我就去LA downtown (只要看到drapery 就是賣窗簾布) 買了這塊有線條(有線條的優點就是等會在車的時候,可以有地方對準)、有點透明的linen窗簾布, 店家跟我強調這個不容易皺, 一碼 $14, 我買了十碼, 重點是他寬度有 120" 夠長, 所以我覺得蠻划算的
I always wanted to make curtain, becuase it looks so much easier than making cloth. However, it may look easy but due to the huge fabrics, make it harder than I thought it would be. First of all, I want to devide my studio and living toom. My husband suggests that we can use sheer fabrics so you can see through a little bit. So I went downtown to look for the fabrics. After viewing many stores, I finally ended up a store with this sheer linen fabrics. The width is 120", quite big enough for the height of my studio. Then I bought 10 yards and the price is $14 per yard. (Now you know making curtain is not cheap huh?) But comparing to other stores, I feel this is a good deal for me.
首先, 要去IKEA 買窗簾軌道, 自己DIY 把軌道裝上, 我們買的是有家L 型的轉彎道
再來你就知道要買多少布囉!
Firstly, we went to IKEA and bought this curtain rail with L shape corner. Then you know how much fabrics you will need.
至於布要怎麼上勾子去勾住軌道, 網路很多人教
And how to install the hooks to curtain? You can find many methods online.
有一種叫french pleat (
請參考這)
One common way is french please. Please see the link
here.
也有人用Curtain Ring (
請參考這) 這個就要買窗簾棍 , 而不是買窗簾軌道
Some other people use curtain ring (please see
here). But for this one, you will need to buy curtain rod instead of curtain rail.
可以先來
這裡看一下窗簾hook & ring 簡單介紹, 你就會知道你比較想用哪種方法囉! (Youtube 真是個好東西呢!)
SO! You can click
here to see the intro of the curtain hooks & ring. Then you will know which way best fit for you. (Youtube is such a good website, isn't it?)
我是個懶人, 所以我選擇最省工的方式 - 四爪鉤 + 布帶 (
請看這裡)
I am such a lazy person, so I always go with the easy one - sew-on tape & four-prong hook. (
Click here)
這個就是四爪鉤的樣子了, 你只要把布帶縫到窗簾就好了
This is how the four-prong hook looks like. All you need to do is sew the tape on the curtain head.
首先我要先把側邊搞定, 所以我選擇把布反摺近來先車一行
To begin with, I fold in the side by 1" and stitch a line.
然後再折進來車一條線
Then I fold in another 1" and stitch again so it looks clean finished.
如果沒把握可以車的很直的人可以用一種叫消失比 (褪色筆) 的東西做上記號
這個東西很神奇, 紫色那一頭可以做記號, 另外一頭白色的可以把它塗掉, 如果不塗掉, 你隔個7~14天就會自動消失了, 這個可以應用在好多東西上面, 衣服阿拼布阿等等
If you are not sure if your lines are straight, I use this vanishing pen (or disappearing pen) to mark on the fabrics. This is really usefule. The purple head and mark on any fabrics, then you can use the other side, the white one, to erase it. If you do not want to erase it, the purple mark will disappear in 7~14 days.
***** YOU CAN BUY THE PEN
HERE!****
側邊搞定後換搞"頭"
我一樣把它先折進來
*這裡要注意了! 折進來多少完全取決於你的布帶和窗簾, 你可以先把四爪鉤勾到布帶裡, 然後掛在窗簾軌道, 然後看上面要多少才能遮住軌道,因為軌道路出來不好看!
Side is done. Move on to curtain head.
I do the sample thing by folding in the fabrics.
*Please note how much you fold in is depending on the width between hooks to ceiling. You have to leave the space to cover your curtain rail.

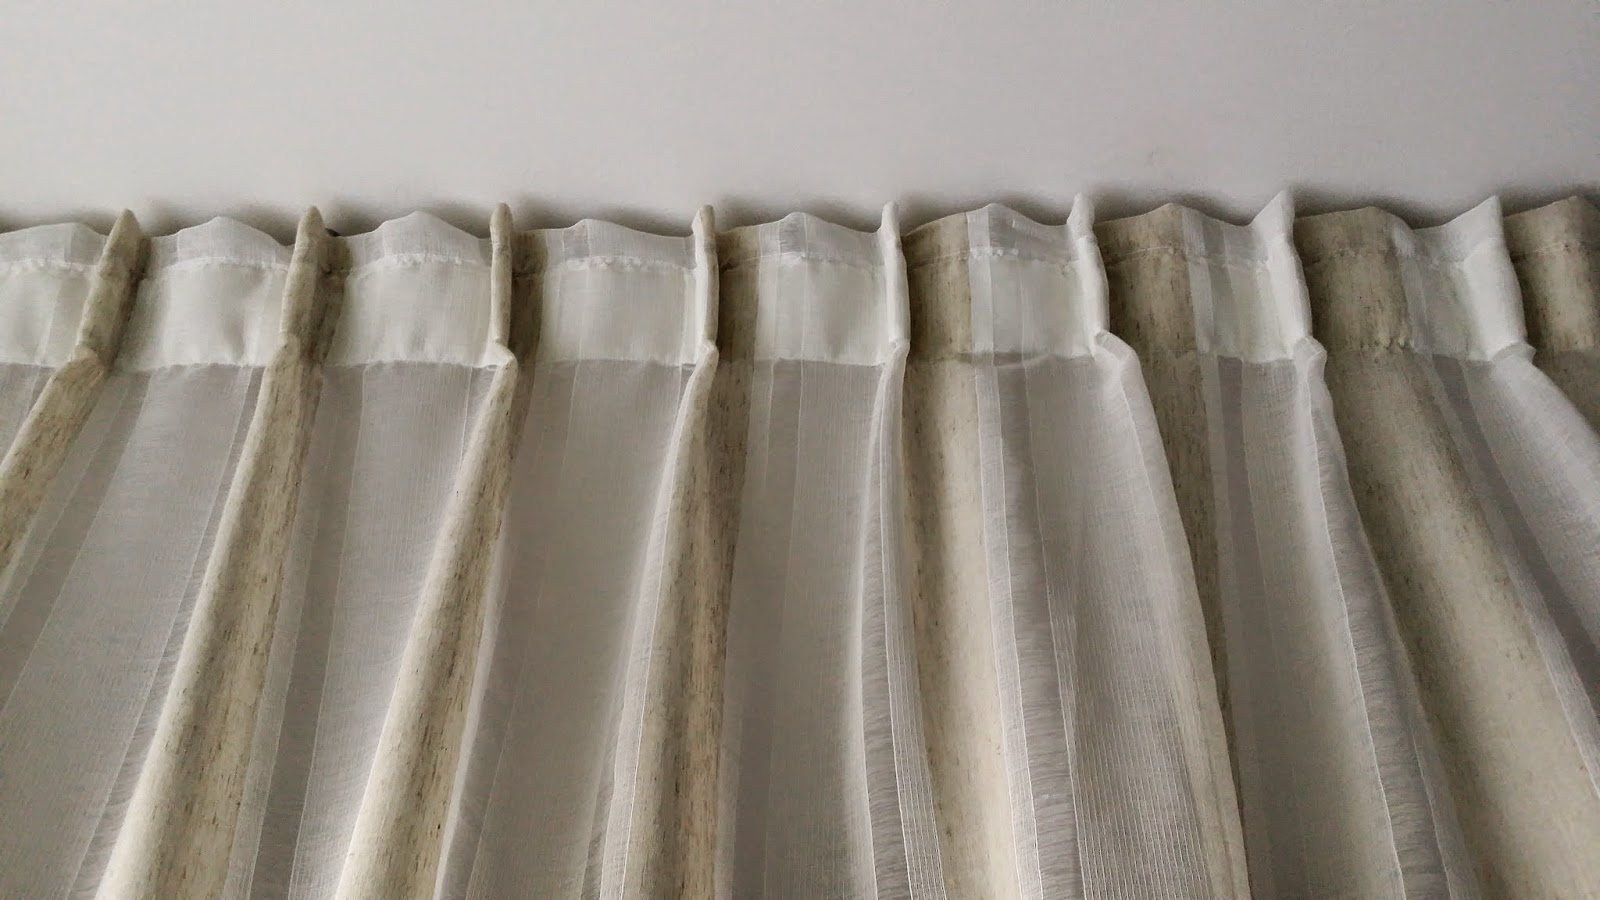
請看上圖,四爪鉤頂到頂的時候,上面紅色箭頭的部分就是可以遮住窗簾軌道的寬度
Please see the picture above. When pushing the prong to the top of the pocket, then you will find out the sapce that you need to save in order to cover the rail.
位置量準確後,就可以安心地把布帶縫上去了!
When getting the measurement, the you can stitch the tape to top of the curtain.
再來就可以把鉤子一個一個鉤上去了
掛上去後,就可以知道你的長度要是多少,然後在窗簾底端做記號,把多餘的剪去,縫法跟剛才都一樣
Next, we can put the hooks on one by one. It has two difference ways to install the hooks on. Please see
here.
When all hooked on the rail, then you can trim off h=the hem. The sewing instruction is the same as before.
完成囉! 是不是很有成就感!
Done! I am loving this hand-made curtain!


留言
張貼留言